June 28, 2022

Video Tutorial for Art Journal Spread "Beautiful and Gorgeous"

Hello you precious, pretty people. 

The FOCUS of today's video tutorial for an art journal spread is that there are creative ways to fix what you might consider... well... ugly. It is mostly about a THOUGHT PROCESS - not as much as a "how to".

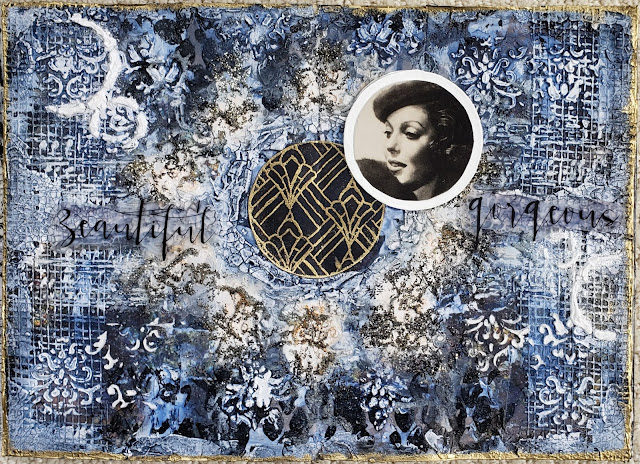
After I added a peach color to my background, I actually showed my mom how bad it looked. She told me the colors reminded her of some art deco colors from a house remodeling show. Then she suggested adding a vintage picture of Loretta Young that my grandfather received while serving in the war along with an "art deco" pattern somewhere...

So a shout-out to mom! I was able to transform my "ugly" idea into something beautiful! The journal spread might have been easier to complete on a canvas board, but that's okay. It worked.

You can see the video tutorial and a complete list of products I used at the bottom of my blog entry.


Loretta Young was both beautiful and gorgeous so the title from the 13arts foil "A Letter to You" was appropriate.


Here is the left side of the spread...


And the right side of the spread...


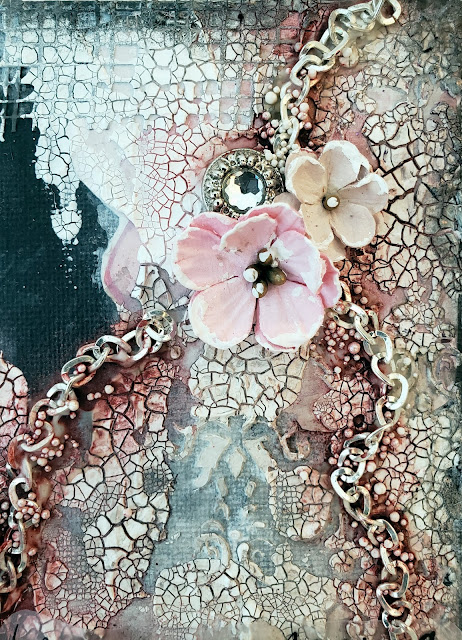
And now the close-up of the center!


Products Used:

13arts
Ayeeda Mist - "Pastel Cobalt"
Foil - "A Letter to You"
Stencil - "Always the Music"
Stencil - "Damask"

Art Anthology
Stencil - "Cracked"

Blue Fern Studios
Glitter - "Black Ice"
Embossing Powder - "Black and Gold"

The Crafter's Workshop
Stencil - "Specimens"

Lindy's Gang
Starburst Spray - "Midnight Rendervous Raven"

Little Birdie Crafts
Stencil - "Threadbare Net"

Prima
Comfort Craft - Distressing Tool
Finnabair Stamp - "Clear Crackle"
Finnabair Art Basics - Modeling Paste
Finnabair Art Basics - "Heavy Gesso"

Ranger
Distress Texture Paste - "Crackle"
Embossing Powder - Super Fine Detail - "White"
Distress Spray Stain - "Dried Marigold"

Liquitex
Gesso - "Black"
Gesso - "White"
Matte Gel
Fluid Matte Gel

Golden
Glass Bead Gel

Versamark
Watermark Stamp Pad

Colorbox
Pigment Ink Pad - "Black"

Finally, here is the video tutorial proving that something "ugly" can turn out great!


Thanks for stopping by! Until next time...

~Jessica Fischer~

June 22, 2022

"Forever" Mixed Media Layout & Video Tutorial

Hi my darlings! I have a video tutorial to share with you today for my new layout titled "Forever" in memory of my cat Crimson. Most of the tutorial focuses on creating very detailed embellishments for your layouts. You can go directly to my video tutorial on YouTube or you can watch it at the end of my blog post.


For a complete list of products I used, you can check the end of my blog post. My paper is from the 13arts Until Dawn Collection "Days and Nights". I used various 13arts mists and stencils also.


I used some 2Crafty Chipboard also. The title is from the Mini Word Set 2. The three pretty rose embellishments are Wild Orchid Crafts' Ivory Rose Cabochon Pearl Effect Embellishments. The frame behind the picture and the three hearts are from Blue Fern Studios.


I used "Army Dust" Glitter from Blue Fern Studios over glass bead gel with the 13arts "Falling Dots" Stencil.


The two small black and one small red flower are from Wild Orchid Crafts that I painted. The black ones are covered in black gesso and spritzed with Lindy's Gang Starburst Spray "Creme Brulee Cream". The red flowers on my page are painted with a mix of 13arts Ayeeda Mist "Chalk Burnt Sienna" and Distress Spray Stain "Black Soot".


The circle chipboard pieces at the top and bottom of the layout are from the 2Crafty Chipboard Frame Viney Circles, and the flowers under them are Prima Oia Flower Embellishments.

Here is a more complete list of products I used:

13arts
Paper - Until Dawn Collection - "Days and Nights"
Ayeeda Mist - "Chalk Burnt Sienna"
Ayeeda Mist - "Pastel Lavender"
Stencil - "Swirls"
Stencil - "Falling Dots"
Fussy Cut Leaves - Aqua Flora Collection - "Colors of Summer"

2Crafty Chipboard

Blue Fern Studios
Stamp - Tattered Newspaper
Glitter - "Army Dust"
Embossing Powder - "Ivory"
Embossing Powder - "Green Ivory"
Stamp - "Crackle"
Chipboard - Frame
Chipboard Stickers - "In the Mood" Collection

Ranger
Distressed Spray Stain - "Black Soot"
Distress Paint - "Black Soot"
Archival Ink Pad - "Jet Black"
Super Fine Detail Embossing Powder - "White"
Glossy Accents
Melt Art - Ultra Thick Embossing Powder - "Clear"

Prima
Finnabair Art Basics - Modeling Paste
Finnabair Art Basics - Heavy Gesso
Flowers - "Oia" Flower Embellishments

Lindy's Gang
Starburst Spray - "Creme Brulee Cream"

Shimmerz
Spritz - "Taupe of the World"

Wild Orchard Crafts
Small Flowers - Pink
Cabochon Embellishments - Ivory Rose Pearl Effect

And here is the video tutorial to show you my process!


I hope you enjoyed the layout! Remember to show tons of love to all of your furry friends every day. They are true blessings.

~Jessica Fischer~

June 21, 2022

"Treasure" Mixed Media Layout - Guest Designer for White with 1 Challenge Blog!

Hello dear friends. Today I am sharing my newest layout titled "Treasure" as guest designer for the White with 1 Challenge Blog for June, 2022! This month's color is orange...


A big "thank you" for the folks over at the White with 1 Challenge Blog for the invitation! Here is the mood board for this June:


Since I love the ocean, I chose a picture of the sunset on the beach.


Please scroll to the end of my blog entry to see a more complete list of products I used.

To begin, I used 98 lb. mixed media paper covered in clear gesso. The orange in the background and the Wild Orchard Crafts Roses were painted with "Dried Marigold" Distress Spray Stain and mixed with the orange from Prima's Watercolor Confections "The Classics".


I used three pieces of 2Crafty Chipboard for my layout. The title "Treasure" comes from the Friendship Mini Word Pack; the small, intricate frame under and above the picture is Frames Tiny Kathleen's; and the larger flourishes to the left and right of the picture is Formal Flourish 3. All pieces were first painted with white gesso. Then I embossed the title with white embossing powder. The flourishes got some crackle texture paste applied randomly.


I added some Mini Prills on the seashells with matte gel medium and some fine glitter under and around the glass stones.


In the picture above, you can really see the fun textures.


The white flowers are from Little Birdie Crafts' "White" Pearl Petites.


In the picture above, you can see the 13arts stencil "Her Style" that I used with modeling paste, then embossed with white embossing powder.

I hope you enjoyed this layout!

Products Used:

2Crafty Chipboard

13arts
Stencil - "Her Style"

Ranger
Distress Spray Stain - "Dried Marigold"
Distress Texture Paste - "Crackle"
Embossing Powder - Super Fine - "White"

Prima
Art Basics - Modeling Paste
Art Basics - Heavy Gesso
Confections Watercolor - "The Classics"

Little Birdie Crafts
Flowers - Pearl Petites - "White"

Wild Orchard Crafts
Roses - "Coral"

USArtQuest
Mini Prills - "Minnie Pearls"

Thanks for stopping by my blog, and I hope to see you next time!

~Jessica Fischer~

June 10, 2022

"Happy" Mixed Media Layout - Video Tutorial - Lindy's Gang - June, 2022 Challenge

Hi my friends. I have a new layout and video tutorial to share with you titled "Happy" for the Lindy's Gang June, 2022 Challenge. You can visit the Lindy's Store here.

As always, a lot of the video tutorial is in fast forward, and some monotonous parts have been shortened. You can find the video below or click on this link to watch it on Youtube. The list of products I used can be found below.


Here is the Lindy's Challenge Board with Flowers being the ingredient this month:


Here are some closeups and angles:


Products Used:

Lindy's Gang
Magical - "Sea Grass Green"
Color Shot - "My Mojito Green"
Spray - Flat Fabio - "Sandra Dee Sepia"
Spray - Starburst - "Autumn Maple Crimson"
Spray - Starburst - "Bodacious Blush"
Spray - Starburst - "Creme Brulee Cream"

2Crafty Chipboard
Friendship Mini Word Pack
Amelia Flower Stems - Small

13arts
Stencil - "Damask"
Elements - "Rose Fields"

Blue Fern Studios
Paper - Tattered Walls Collection - "The Carolina Room"
Stamp - Text

Prima
Finnabair Art Basics - White Heavy Gesso
Finnabair Art Basics - Modeling Paste

Ranger
Distress Ink Pad - "Antique Linen"
Distress Ink Pad - "Vintage Photo"
Archival Ink - "Jet Black"
Distress Texture Paste - "Crackle"

Wild Orchid Crafts
Roses
Mini Roses

Art Anthology
Stencil - Cracked

PearlEx
"Antique Copper"

49 and Market
Flower Blossom Blends

Now for the video tutorial! I hope you like it.


Thanks for stopping by!

~Jessica Fischer~

June 07, 2022

Video Tutorial for my First Art Journal Pages! - "Botanicals" - More than Words Challenge June, 2022

Hello, hello! 

For my very first art journal pages I decided to make a video tutorial! It is a lot longer than I usually make for layouts even though I sped up a lot of the video and even jumped forward through repetitious parts. I added detailed explanations of my steps in the tutorial. You can watch the video at the bottom of my blog post along with the list of products I used.

I created "Botanicals" for the More than Words Challenge for June, 2022. The word is "botanicals", and the creative challenge is enchanting. The added bonus was to put the number 150 on your entry. Here is the challenge board:


I used botanical images that I printed from free internet images. For the creative challenge, enchanting, I chose a color scheme that I have always found enchanting. Coral, raspberry, navy, and greens are "dreamy" to me. I used techniques such as highlighting the textures with gesso to make it look even more enchanting.

Along with the number 150 I put on the right page, I also put the numbers 2, 2, and 2 on the left page since two is my favorite number. Here is the left side of the page:


And another angle:


Here is the right page with the number 150:


I wanted to add a closeup of the botanicals on the right page:


Products Used:

13arts
Paper - Aqua Flora Collection - "Shades of Black"
Stickers - Secret Letters Collection

Lindy's Stamp Gang
Magical - "Sea Grass Green"
Magical - "Cape Cod Coral"

Heidi Swapp
Color Shine - "Navy"
Color Shine - "Raspberry"

Prima
Color Bloom Spray - "Deep Teal"
Finnabair Art Basics - Modeling Paste
Finnabair Art Basics - Heavy Gesso

Ranger
Distress Texture Paste - "Crackle"
Archival Ink Pad - "Jet Black"

Little Birdie Crafts
Stencil - "Threadbare Net"

Liquitex
Clear Gesso
White Gesso
Fluid Matte Medium


Here is the video tutorial I promised you! You can also watch it on my Youtube Channel.


Have a super day.

~Jessica Fischer~

May 24, 2022

"You are Amazing" Canvas Board Layout for the 13arts Challenge - May, 2022

Hi my friends!  I went completely outside my comfort zone for my project for the 13arts challenge this month.  I made a layout titled "You are Amazing" on a 9" x 12" canvas board that I covered in black gesso. 


This is a picture of my cat Crimson when she was younger. To achieve the proper tone and hue of red in the challenge board, I had to get creative! I used fluid matte medium mixed with "Antique Copper" PearlEx, added a pinch of fluid acrylic paint in "Crimson", then a bit of Shimmerz "Truffle" Spritz.


For a more complete list of products, you can check out the bottom of my blog entry.

First I used some matte gel medium to attach some papers randomly in the background. Next, I used the 13arts "Damask" stencil with modeling paste then put a ton of Ranger Distress Crackle Texture Paste randomly over the canvas board. I painted three Blue Fern Studios' Lillies using a mixture of 13arts "Pearl Scarlet" Ayeeda Mist and Shimmerz "Truffle" Spritz with white gesso on the tips.


The long piece of rose chipboard is the 2Crafty Chipboard Rose Vine Border, and I painted it dark brown then embossed it with Blue Fern Studios "Pure Red" embossing powder then a second time with Ranger's Ultra Thick Embossing Powder "Clear". The small taupe flowers and small pink flowers are from Little Birdie.


Behind the picture is some 13arts "Rose Fields Collection" Elements as matting.  The title is a 13arts sticker from the "Secret Letters Collection".


Here is a closeup of the top right corner of the canvas board where you can get a good look at the white USArtQuest Mini Prills that I sprinkled near the chain pieces.


Finally, you can see the cute feathers from Wild Orchard Crafts and the cardboard piece I put behind the layers for my picture. To finish the canvas board, the last thing I did was went around the edges with Ranger's "Black Soot" Distress Ink Pad.


I hope you enjoyed this project, and I will see you next time.

Here is a more complete list of some of the products I used for my canvas board:

13arts
Stencil - "Damask"
Ayeeda Mist - "Pearl Scarlet"
Elements - "Rose Fields Collection"
Stickers - "Secret Letters Collection"

2Crafty Chipboard

Lindy's Stamp Gang
Spray - Flat Fabio - "Sandra Dee Sepia"

Ranger
Distress Crackle Texture Paste
Distress Ink Pad - "Fire Brick"
Distress Ink Pad - "Black Soot"
Ultra Thick Embossing Enamel - "Clear"

Little Birdie
Small Flowers - "Taupe"
Small Flowers - "Pink"

Shimmerz
Spritz - "Truffle"
Spritz - "Taupe of the World"

Blue Fern Studios
Embossing Powder - "Pure Red"
Flowers - Lillies
Flowers - "Attic Charm Daisies"

Wild Orchard Crafts
Feathers - "White"

USArtQuest
Mini Prills - "White"

Take care, and I hope you had a great month of May!

~Jessica Fischer~

May 18, 2022

"Escape" Layout - Lindy's Stamp Gang Challenge for May, 2022

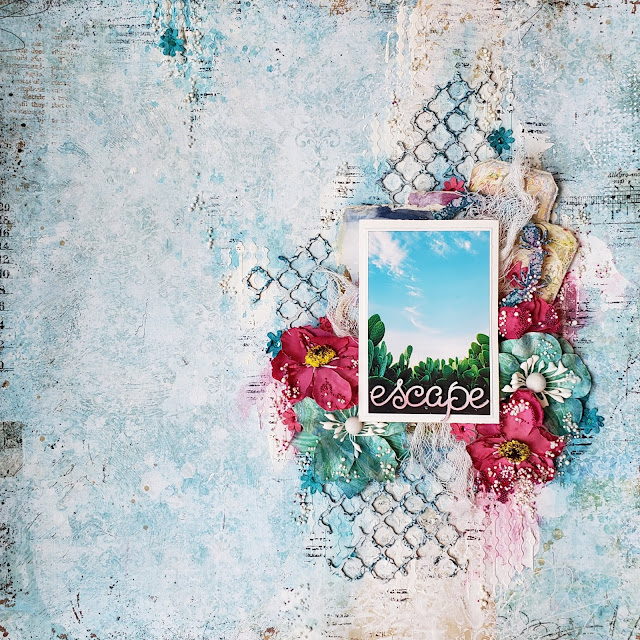
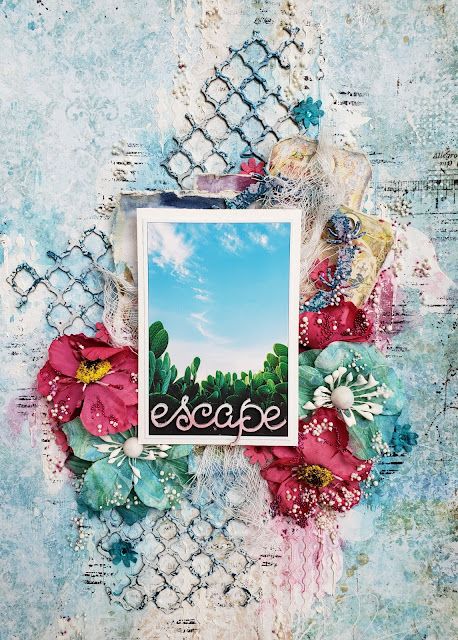
Hello friends.  I have a layout to share today for the Lindy's Stamp Gang Challenge for May titled "Escape".  You can view all additional information for the challenge on the Lindy's Blog.


Here is the challenge board for the month:


To get the bright blue color, I had to get creative and improvise with my Lindy's products and add them together in a Ranger Mini Mister.  In the mister, I added LSG Midnight Rendervous Raven Starburst Spray, LSG Sassy Sapphire Magical, and a touch of a 13arts Ayeeda Mist in Pastel Cobalt. For the bright pink, I used the LSG Pretty in Pink Pink Starburst Spray. You can visit the Lindy's online store here.  Here is a picture of the Lindy's products I used:


Since I just recently got back into creating, I used what I had on hand from years ago.  A full list of products used can be found at the end of this blog entry.  Here are some closeups:


Products Used:

Lindy's Stamp Gang
Starburst Spray - "Midnight Rendervous Raven"
Magical - "Sassy Sapphire"
Starburst Spray - "Pretty in Pink Pink"

13arts
Elements - "Aqua Flora"
Stencil - "Falling Dots"
Ayeeda Mist - "Pastel Cobalt"

2Crafty Chipboard

Blue Fern Studios
Paper (background) - Happy Accident 2 - "Tonic"
Flowers (large, pink) - "Heartland Blossoms"
Seedlings - "Maroon"
Embossing Powder - "Seven Seas"
Stamp - "Crackle"

Little Birdie
Handmade Flowers (tiny blue and pink ones with diamonds in the center)
Primed Chipboard (circular shape to the top right of the picture)

Ranger
Distress Ink Pad (pink part of the title chipboard) - "Worn Lipstick"

Prima
Flowers (large blue/green)

USAQuest
Mini Prills (white seedlings)

Magenta
Paper Products & Accessories (two tags behind picture)


I appreciate you taking the time to see my layout. Until next time!

~Jessica Fischer~

April 30, 2022

"Cherish" Layout for April's White with One Blog Challenge

 Hello everyone! Today I want to share my mixed media layout titled "Cherish" for April's White with One Challenge.


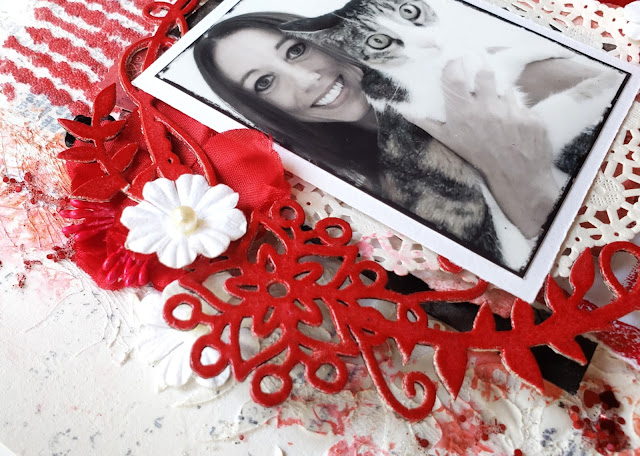
The color this month is red, and since my cat's name was Crimson, I couldn't resist trying a layout! I used laces from my stash and silky red flowers for inspiration from the mood board. Here is the mood board for the challenge:


The chipboard pieces are all from 2Crafty Chipboard - Anika's Floral Frame, flourishes, and title.  I used 13arts Ayeeda Mist in Pearl Scarlet with a Prima crackle stamp on the background.  I also used a Ranger Distress Ink Pad in Fire Brick and Black Soot to go around some of the cardstock behind the photo.


For a more complete list of the remaining products I used for this layout, you can check my list at the end of this post.  Here are a few more closeups:


Some of the products I used:

2Crafty Chipboard:

13arts:
  • Ayeeda Mist - Pearl Scarlet
  • Lines Stencil

Ranger Distress Ink Pads:
  • Fire Brick
  • Black Soot

Blue Fern Studios:
  • Stamps (used to create a piece of the matting behind the picture and a text stamp with black Archival Ink in the background)
  • Embossing Powder - Pure Red
  • Seedlings - Beating Heart
  • Flowers - Christmas Blossoms

Little Birdie:
  • Handmade Flowers - White with Pearls
  • Glitter - Crimson Hearts
Thank you for checking out my layout and hope to see you soon.

~Jessica Fischer~